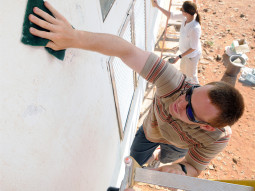
 No one wants to have to redo this DIY job any more than is necessary, and these tips will increase the quality and longevity of your work.
Painting the outside of your house is a daunting task but one that can rejuvenate the property and increase its value. Most people want to perform this duty as infrequently as possible and this can be achieved by following these professional guidelines for paint preparation.
In terms of paint choice, a company may be particularly successful at building its brand through national marketing campaigns and stores may push certain formulas but this has no bearing on the quality of the wares themselves. Companies also regularly change the formulas of their paint ranges and the paint you used before may not offer the same ease of application and durable finish the second time around. Industry bodies are however on hand to give advice on the quality of paints available in this evolving market and information from the Consumer Reports Paint Tests is a well-known and trusted indicator of a product’s characteristics. It is readily available online or you can simply ask store workers to point out the top performing cans available in their shop.
Buy in bulk to keep costs down
For people with one eye on their wallet market research has shown that buying in bulk can reduce costs more than you think, with savings of as much as 50% to be had if you chose a 5-gallon can rather than a 1 gallon one. If you hire a professional to do the paintwork, this expensive outlay can be offset by the 50% savings that result from selecting to use spray-paint instead of roller and brush alternatives. This is a much faster approach to painting once you have done the extra preparation work sealing areas from unwanted paint exposure, and it also guarantees a more even and thicker layer.
Preparation is the key
The surfaces to be painted also need to be prepared properly if you want a professional and long-lasting coating. Being open to the elements, the outside of your house will be positively filthy and a scrubbing brush or power washer is a practical way of removing any dirt and chalking. Wind, rain, the cold and heat will also have weathered surfaces that need to be smoothed as much as possible before the paint application. This includes the sanding away of old paint and removal of waterproof sealant and filler. You can then add new caulking to any cracks around doors, windows and trim.
Once all this is done the painting can finally get underway. However the quality of your work is weather dependent and you will need to a 48 hour window with temperatures ranging from 50 to 85°F, clear skies and low winds and humidity in order to maximize the potential of the work. And remember that all paint should be mixed at the same time and together in one large container to guard against the natural colour variants that exist between cans. You will find further advice about the application process itself elsewhere on this site, but one point important enough to reiterate here is that you should apply one primer layer and two coats of the paint for best results.
Exterior walls are one of the most challenging of areas to paint. However following all these steps will make the process much easier and will improve the results of even the most amateur of painters.
Lee is a DIY blogger and fulltime dad. Follow him on twitter @diylee
